
Ubuntu Server is a variant of the Ubuntu operating system. Unlike Ubuntu Desktop, Ubuntu Server has no Desktop GUI and relies primarily on the command line. As the name suggests, it is designed for servers. Ubuntu Server is an ideal choice for creating a headless setup using your Raspberry Pi. Let’s learn how to install Ubuntu Server on a Raspberry Pi.
Requirements
- A Raspberry Pi 4.
- An SD Card with at least 16 GB of memory.
- An SD Card Reader
- Raspberry Pi Imager
Prepare your SD Card
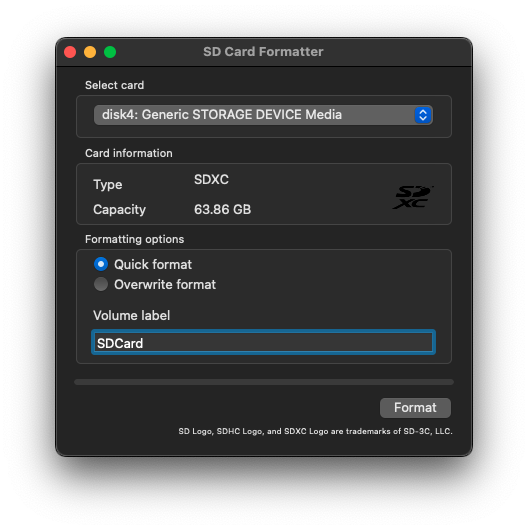
Insert your SD Card into your card reader and use SD Formatter to format it. You can select the Quick Format option while doing so.
Raspberry Pi Imager
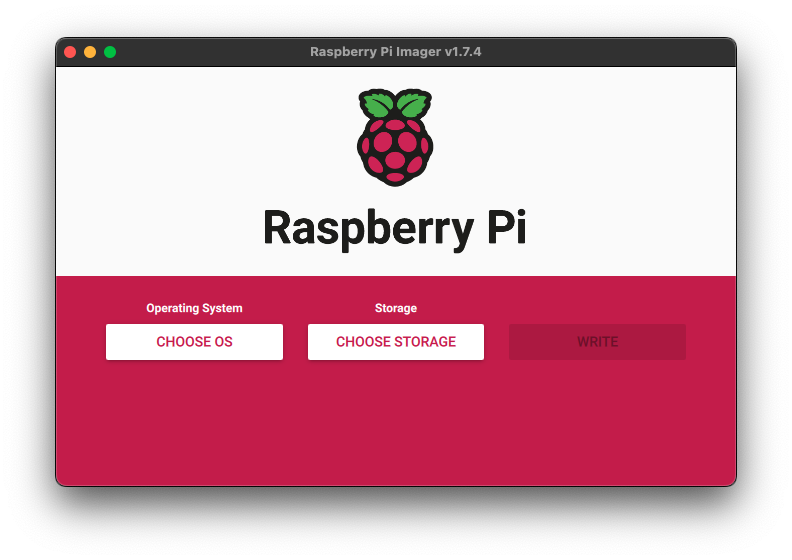
We’ll be using the Raspberry Pi Imager for installing Ubuntu Server on the Raspberry Pi. The RPi Imager lets you download the latest Ubuntu Server image right from their app.
You can download the latest version of the Raspberry Pi Imager for your operating system from here.
Installing Ubuntu Server 22.04
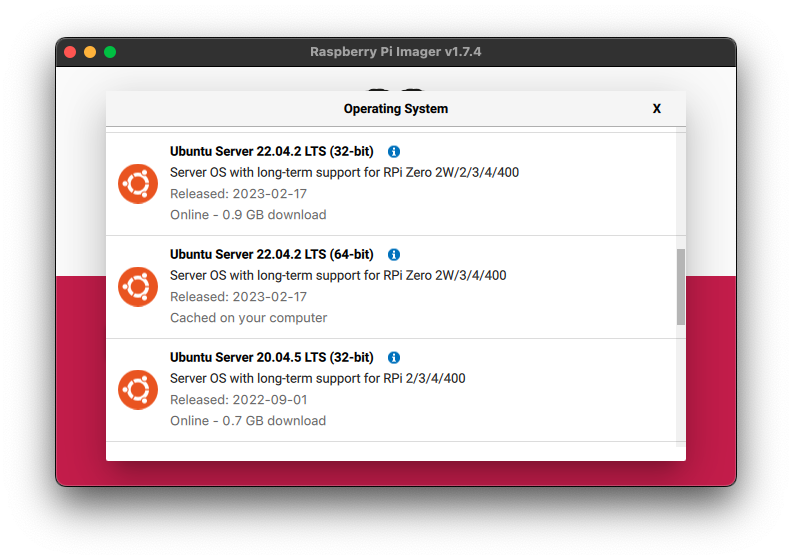
Open Raspberry Pi Imager on your computer. Under Operating System, click on Choose OS.
Go to Other general-purpose OS
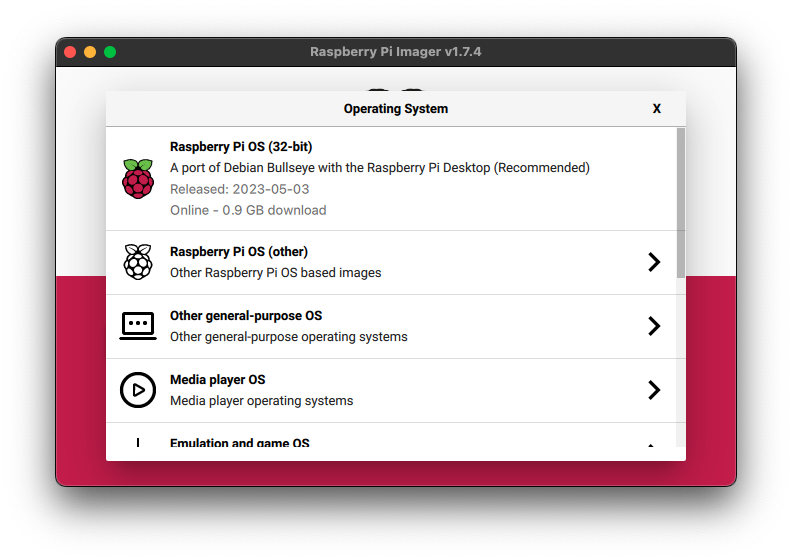
Select Ubuntu from the list of available options.
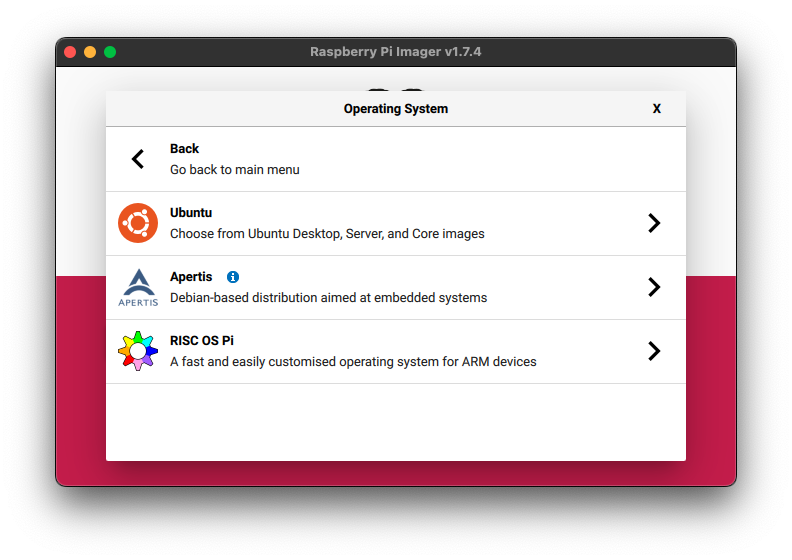
Select Ubuntu Server 22.04 (64-bit) from the list.
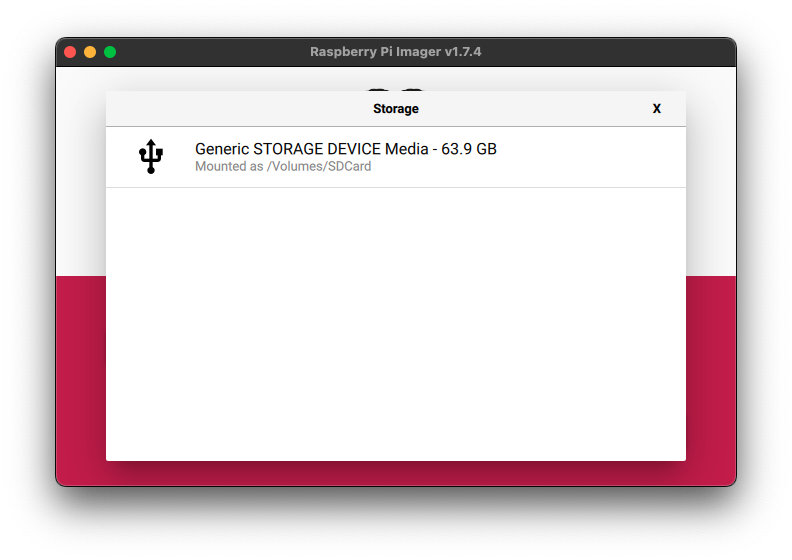
Choose your SD Card under Storage options.
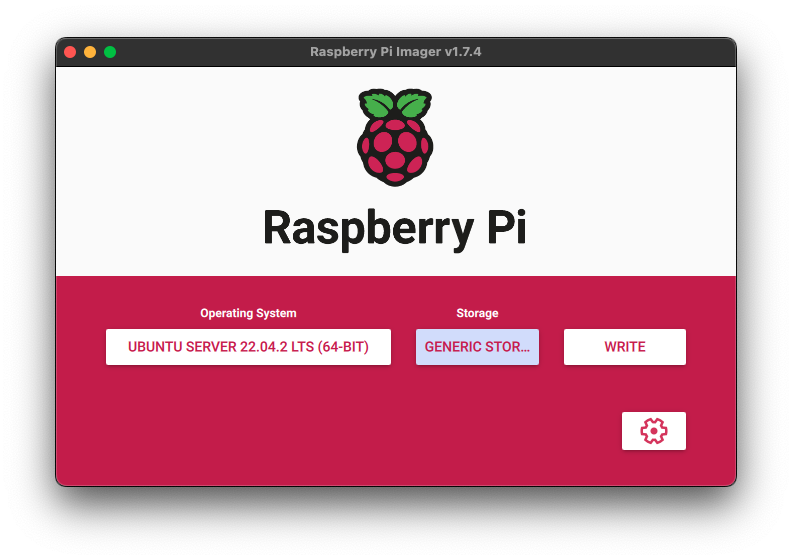
Before you click on WRITE, there are a few options that we need to configure.
Click on the gear icon below the WRITE button.
You can set a custom hostname if you like. I’m going to use pibuntu for this tutorial.
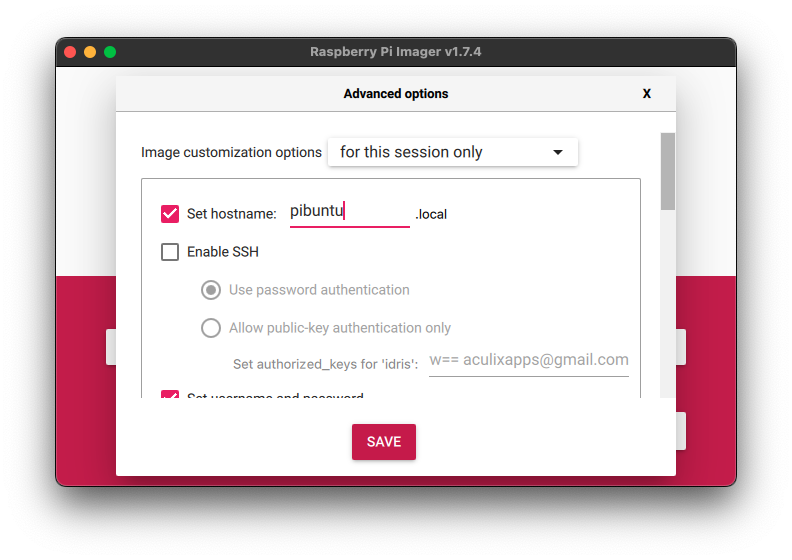
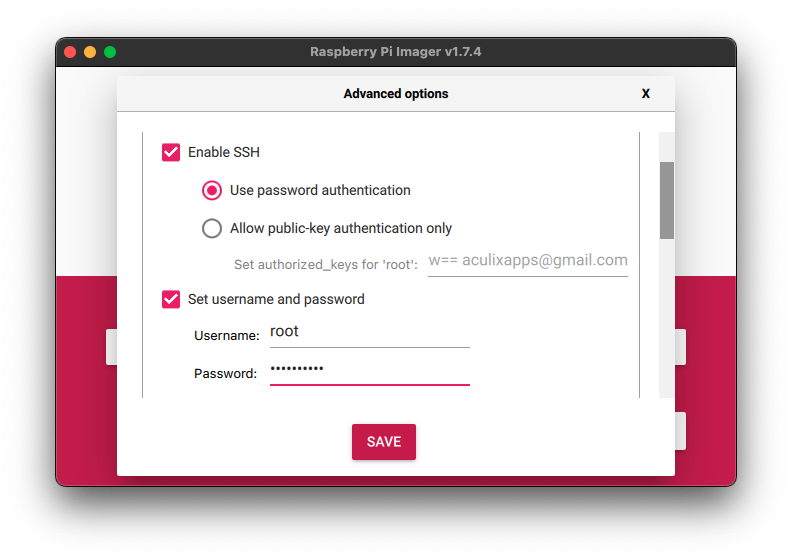
Click on Enable SSH. We need to enable SSH access to control our headless Ubuntu Server setup from any computer without attaching a physical keyboard or mouse to our Raspberry Pi.
Under SSH options, select Use password authentication.
Set a username and password for your SSH connection. I like to set the root username and password at this step. You can create a non-root user with sudo privileges after the installation.
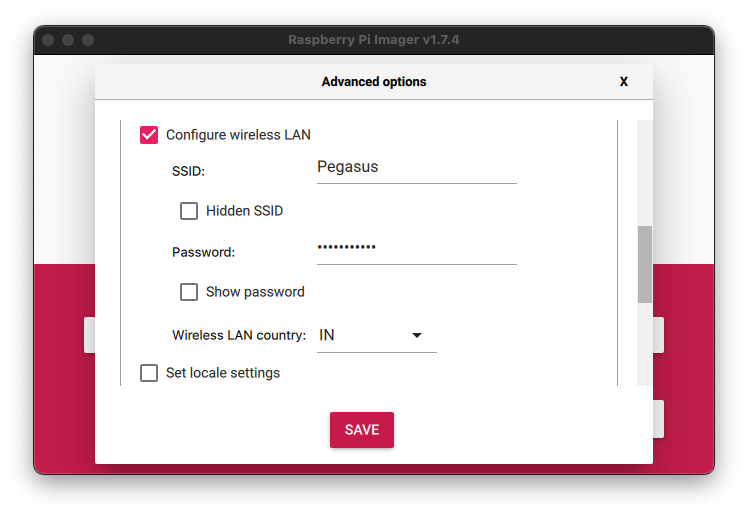
Configure your WiFi settings by entering your SSID and password. Even if you are going to be connecting your Pi using ethernet, I’d still suggest configuring the WiFi option at this step.
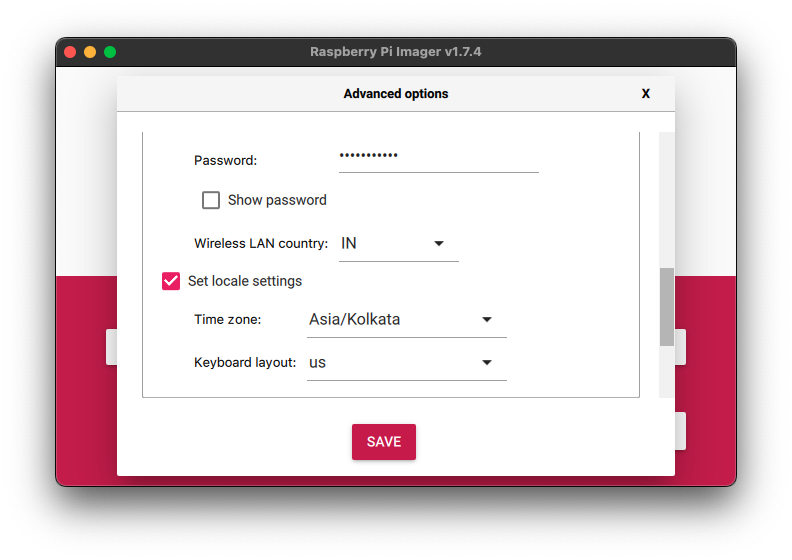
Set your locale settings to match those relevant to your current location.
Finally, click on SAVE.
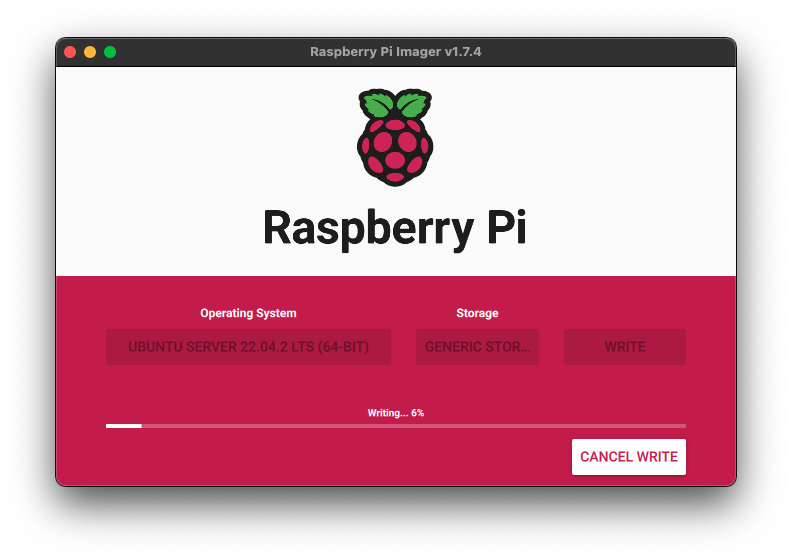
Next, you can click on WRITE to begin flashing the Ubuntu Server image to your SD Card. If you’re doing this for the first time, Raspberry Pi Imager will first download the latest Ubuntu Server image and then flash it to your SD Card.
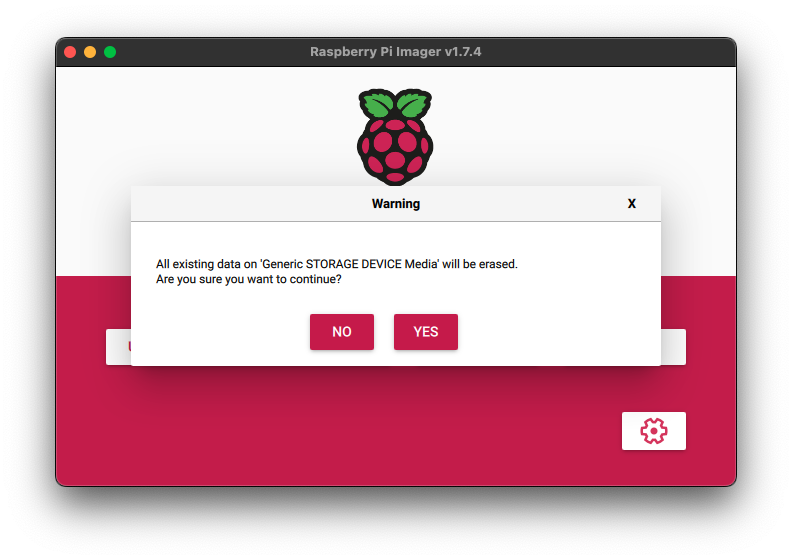
Click YES on the next prompt. Now, you just have to wait until the RPi Imager does its thing.
Done. After clicking Continue, you can safely remove your SD Card from your card reader.
You’ve successfully installed Ubuntu Server 22.04 on your Raspberry Pi 4.